There are two options, where you can place your ad. The first one is to place your ad in the “newsfeed”. Your ad will look like a normal post and appear for every person of your target group, no matter if they are using a desktop computer or a mobile device. That’s the perfect place for your advertisement.
The second option is to display the advertisement in the right column of the Facebook page. Even though it is the cheaper option, there are two major disadvantages. On the one hand, the ad will only appear on desktop computers and on the other hand, it is not in the user’s direct field of vision.
That’s why we recommend you to place the ad in the newsfeed. Find out how that works:
Since you have done all the preparation, you can now start to set up your Facebook ad. Remember, it is mandatory that you have already set up your facebook page! Also, you need to determine the type of payment for your advertisement. Don’t worry, you can decide how much you want to spend. We recommend you a test budget of 5 €.
Let’s get started…
Step 1:
Go to the menu option “Create Ad”
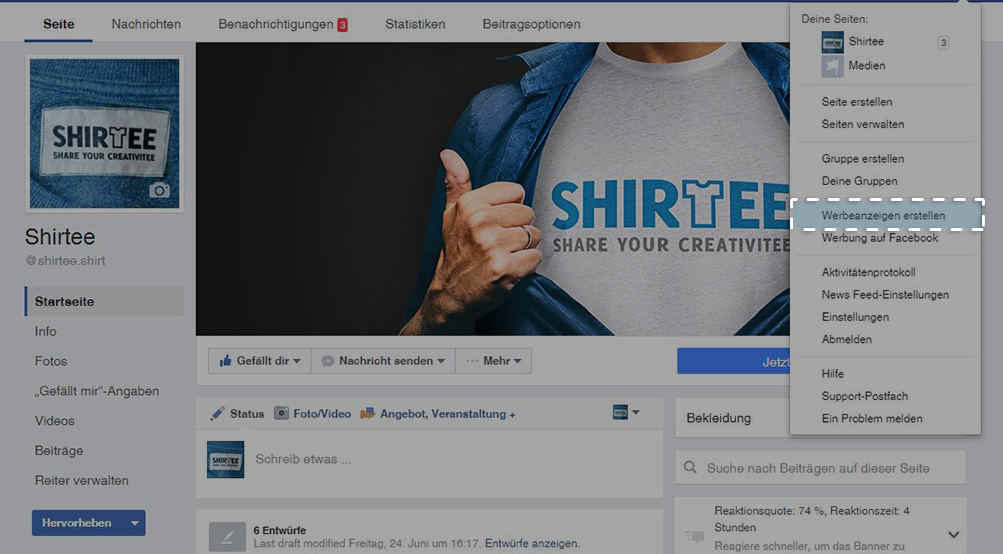
Step 2:
Now choose the objective of your campaign. Ask yourself:
The objectives “Boost your posts” and “Increase conversion on your website” are particularly suitable for your purposes.
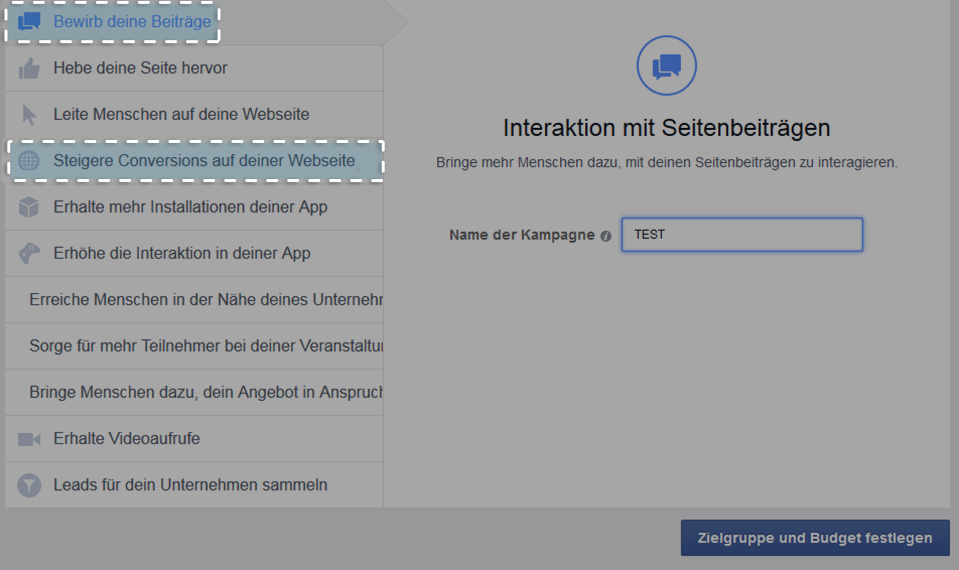
Step 3:
To boost your posts, you only need to enter a campaign name and select “define audience and budget“.
In order to increase conversion on your website, you need to enter the link to your campaign and select the Facebook pixel to measure your success.
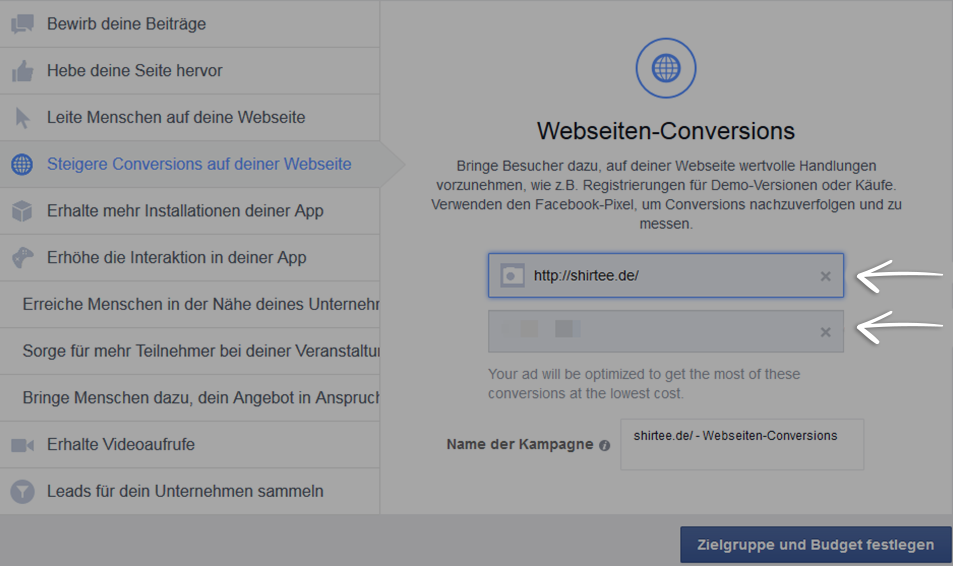
Step 4:
You already know this menu from chapter 4.2 Set a sales goal. To determine a realistic sales goal, you have used this menu option to check the size of your target group. Now you do the same as in chapter 4.2. Enter all the relevant parameter of your audience in the appropriate fields.
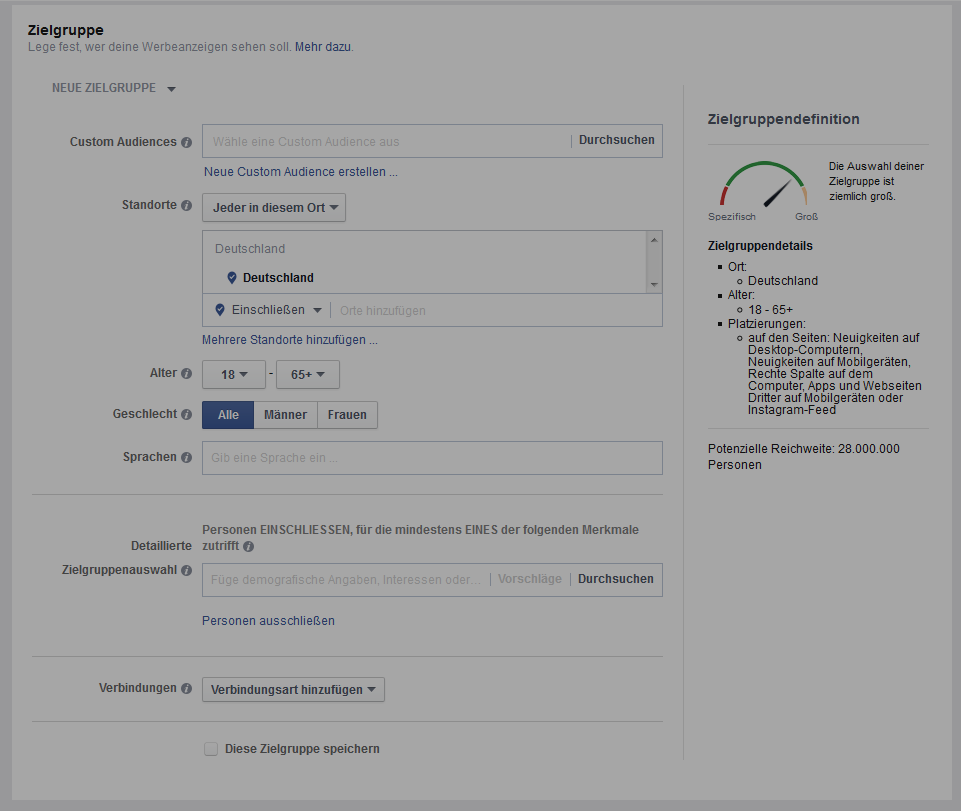
If you take into consideration to sell a similar product to the same audience, you can save your selected target group for later campaigns.
Step 5:
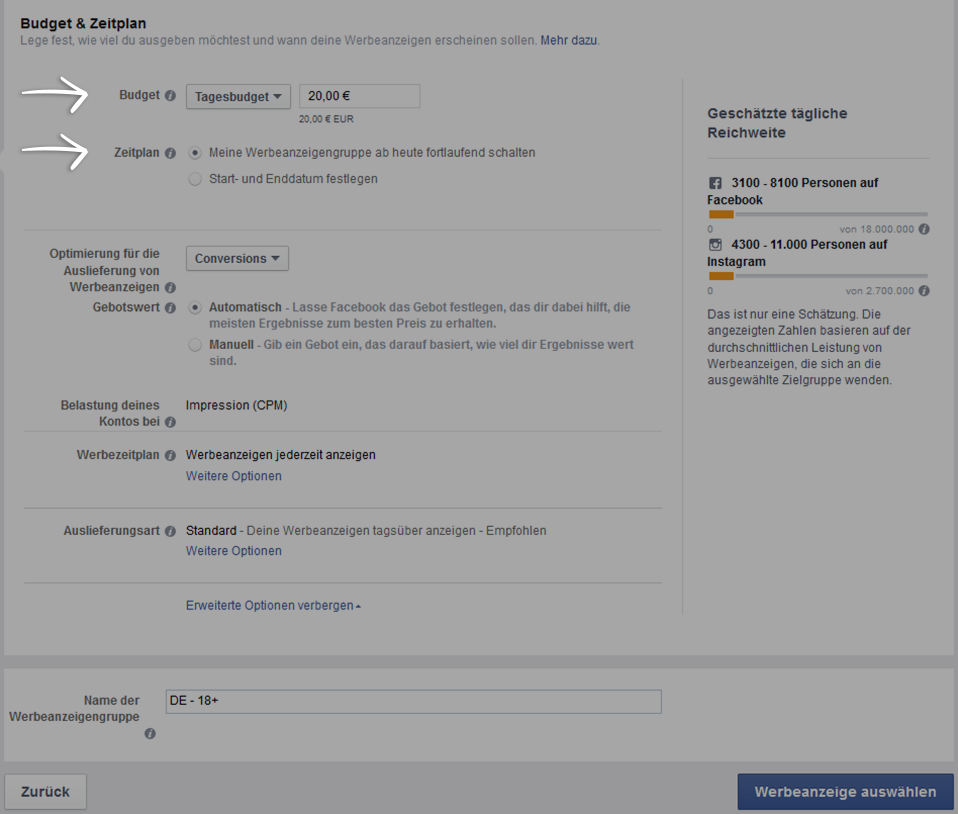
Select your budget and schedule for the ad campaign further down on the page. Now choose between a maximum daily budget or lifetime budget. Facebook will automatically offer you different variations of advertisement according to your budget.
Set up a schedule for your campaign and continue with the next step.
Step 6:
If you have chosen to boost your posts, you can now select the post you would like to promote by clicking “Select a page post”. After selecting a post, you will be able to see (on the right side of the page) the way the ad will be displayed on different devices. Make sure that it looks like you imagined.
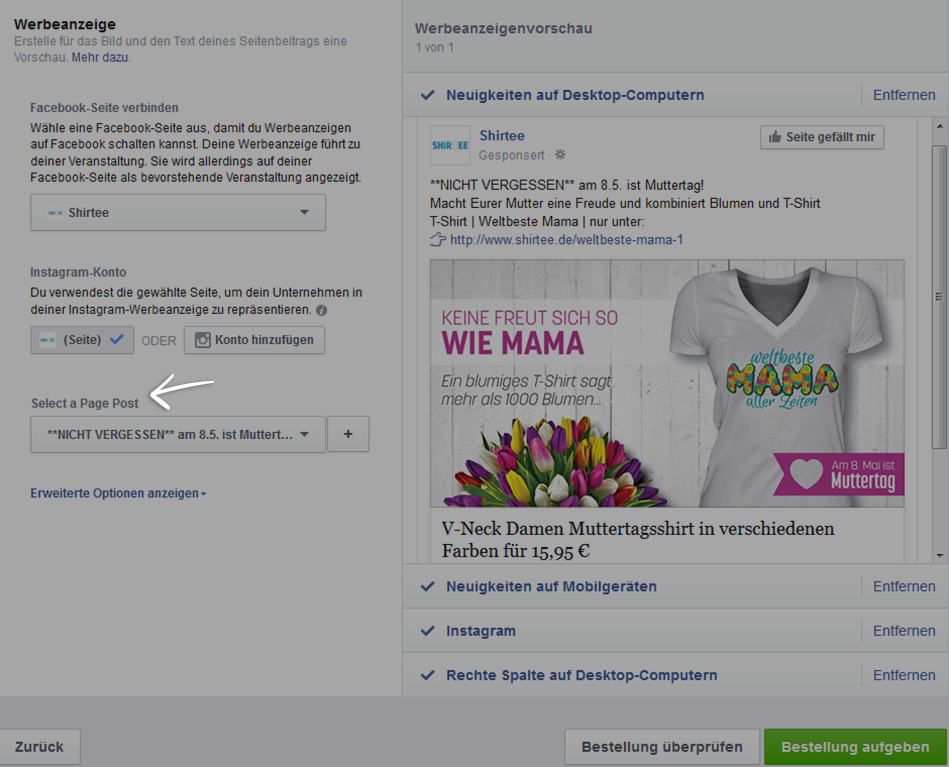
Click “remove” behind “Right Column On Desktop Computers” and choose if you would also like to place ads on Instagram. You have made your choices? Then click “Place Order” and your ad is now online.
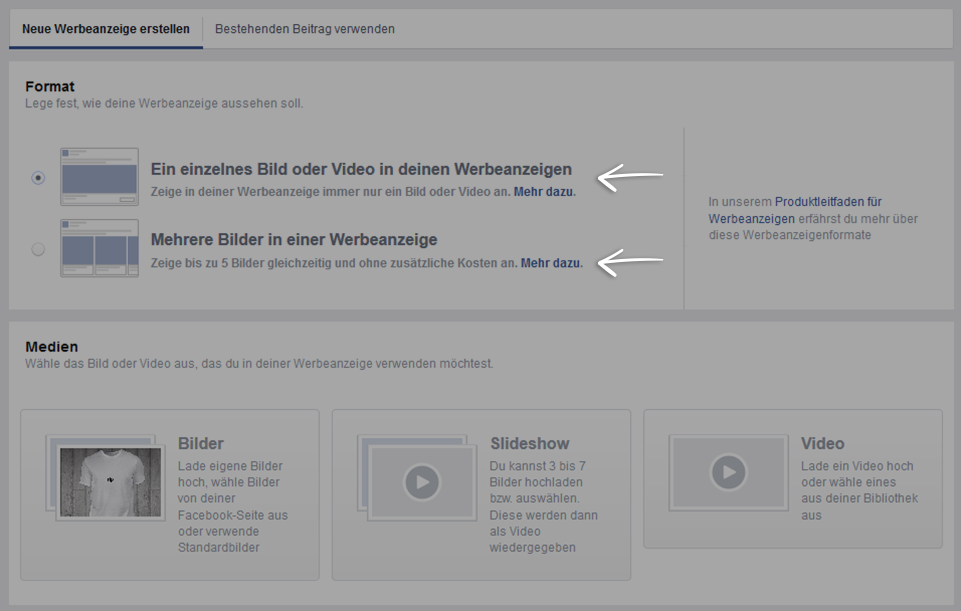
If you have chosen to increase conversion on your website, you need to select between promoting one image or several images in the carousel format.
Carousel Format:
Write a text underneath every photo of the carousel in order to give your customers extra information on your product. There are no additional costs.
Standard Ad:
This ad looks like a normal post. The information “Sponsored” indicates it as advertisement. We recommend this standard ad, since it puts the focus completely on your shirt.
You can find the so-called “Call to Action” Button on the left. If you choose this button, a small field will be installed underneath your image, which attracts attention and simplifies the purchase. Select a useful version like “Shop Now”.
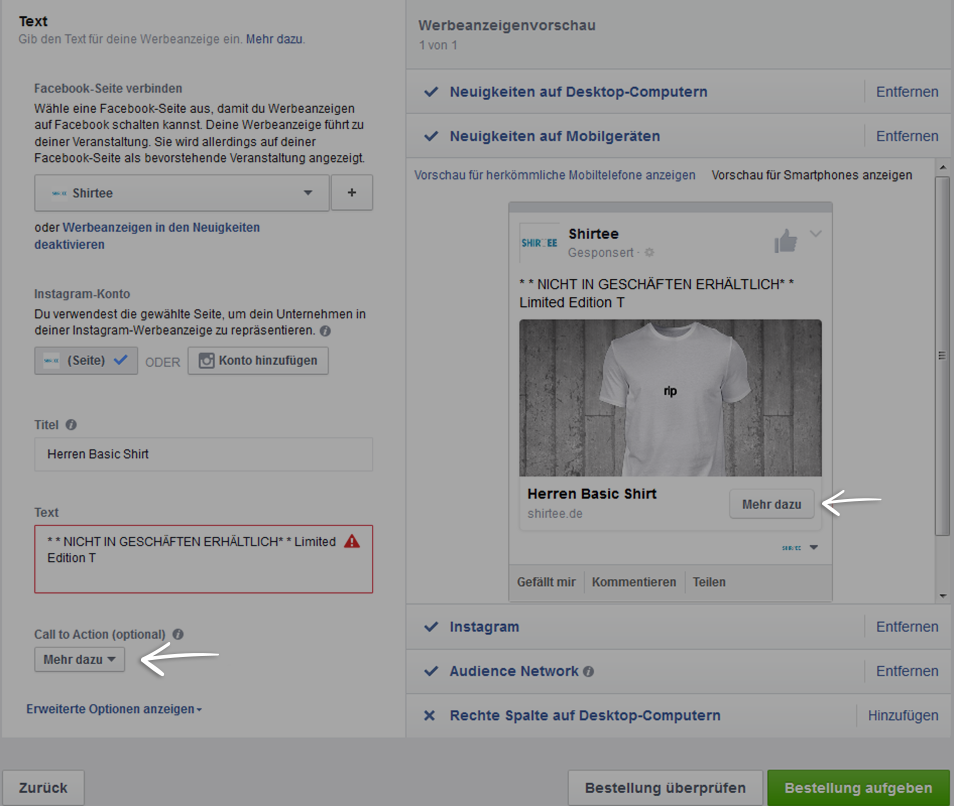
After making all the necessary settings, you only need to check the display of your ad on different devices, remove “Right Column On Desktop Computers” and decide on whether or not to advertise on Instagram.
Click “Place Order” and you are done.
Congratulations, your advertisement is now online!
Merken


